Install PSelect
- hamza alpoguz

- 8. Juli 2025
- 1 Min. Lesezeit
Aktualisiert: 16. Juli 2025
🔧 Installation & Setup
📝 Requirements
Blender 4.2 or higher
Works on Windows, macOS, and Linux
📦 Installation Methods
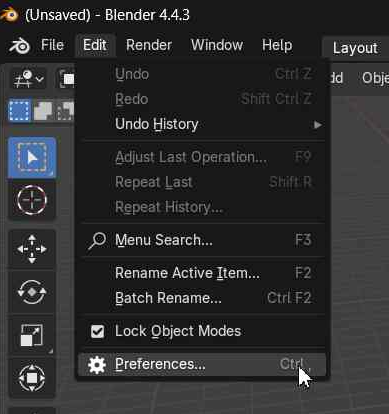
🔌 Method 1: Standard Add-on Installation

🖱 Method 2: Drag & Drop

🚀 First-Time Setup
Once installed:
Press N to open the Sidebar
Switch to the “PTools ▶” tab
Click “+ Add Group” to create your first Selection Group
Select one or more objects or bones in the scene
Click “New” to create your first Selection Set
Use the UI to rename, color, organize or isolate your sets
You're ready to start organizing your scene with PSelect!